Introducing Fluffernutter Brownies Recipe
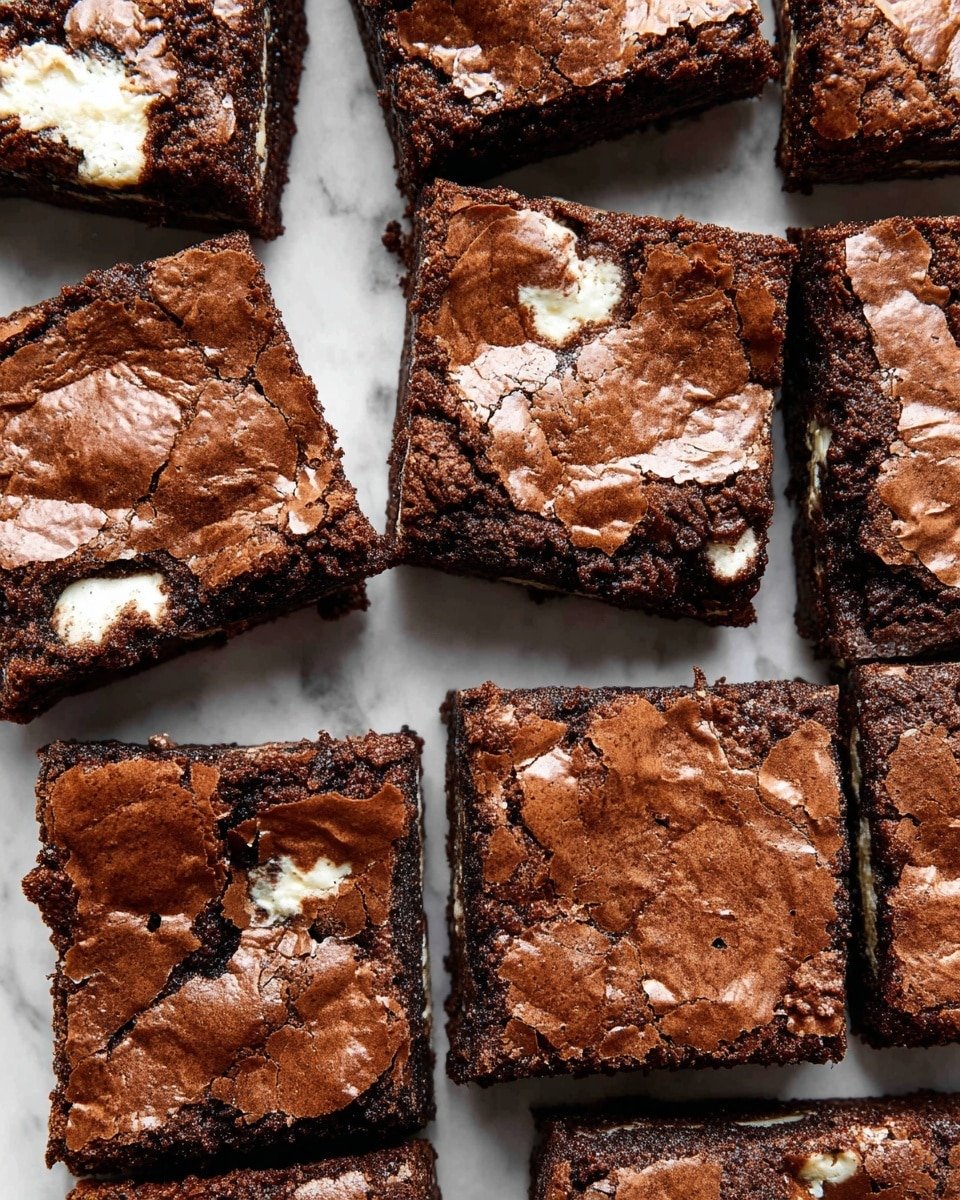
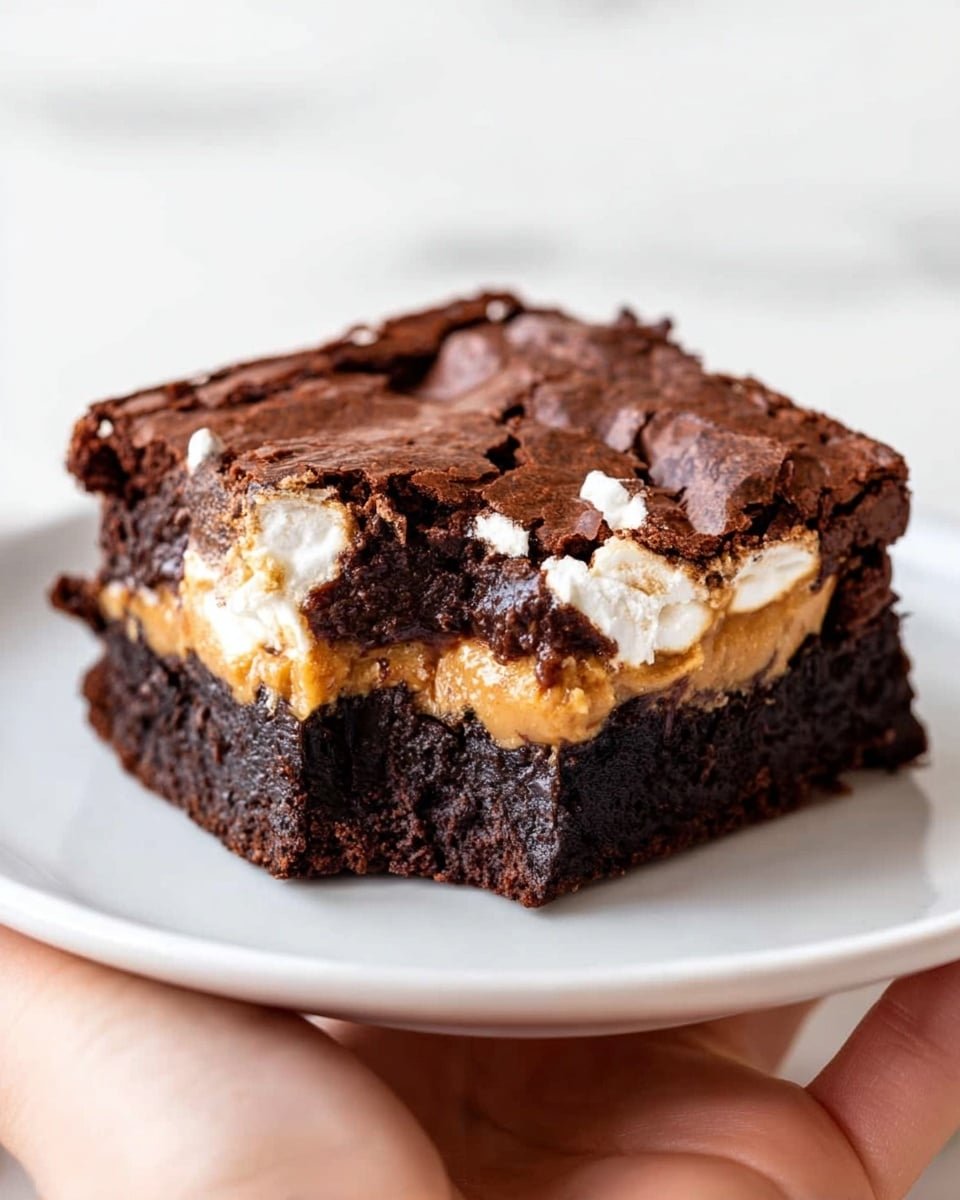
If you’re craving a dessert that’s decadently rich with a playful twist, this Fluffernutter Brownies Recipe is your new best friend. Imagine the deep, velvety chocolate base melting in your mouth, perfectly balanced by the creamy peanut butter swirls and that iconic, fluffy marshmallow charm hugging every bite. This isn’t your average brownie—it’s an indulgent flavor explosion that’s so crave-worthy, you’ll find yourself sneaking seconds without shame.
I love serving these at gatherings because they’re always the star of the show—whether it’s a casual weekend get-together or a festive holiday treat. You’ll love how this recipe combines the nostalgic joy of a fluffernutter sandwich with the fudgy goodness of brownies. Ready to elevate your dessert game? Let’s dive in!
Why This Recipe Works
- Flavor-Packed: The bold chocolate cocoa combined with peanut butter and marshmallow fluff creates layers of irresistible taste.
- Easy Steps: The method is straightforward — no complicated techniques, just great flavor.
- Reliable Results: Precise temperatures and ingredient measures ensure perfect fudgy brownies every time.
- Flexible: Swap peanut butter for almond butter or add nuts for a satisfying crunch.
Ingredients You’ll Crave
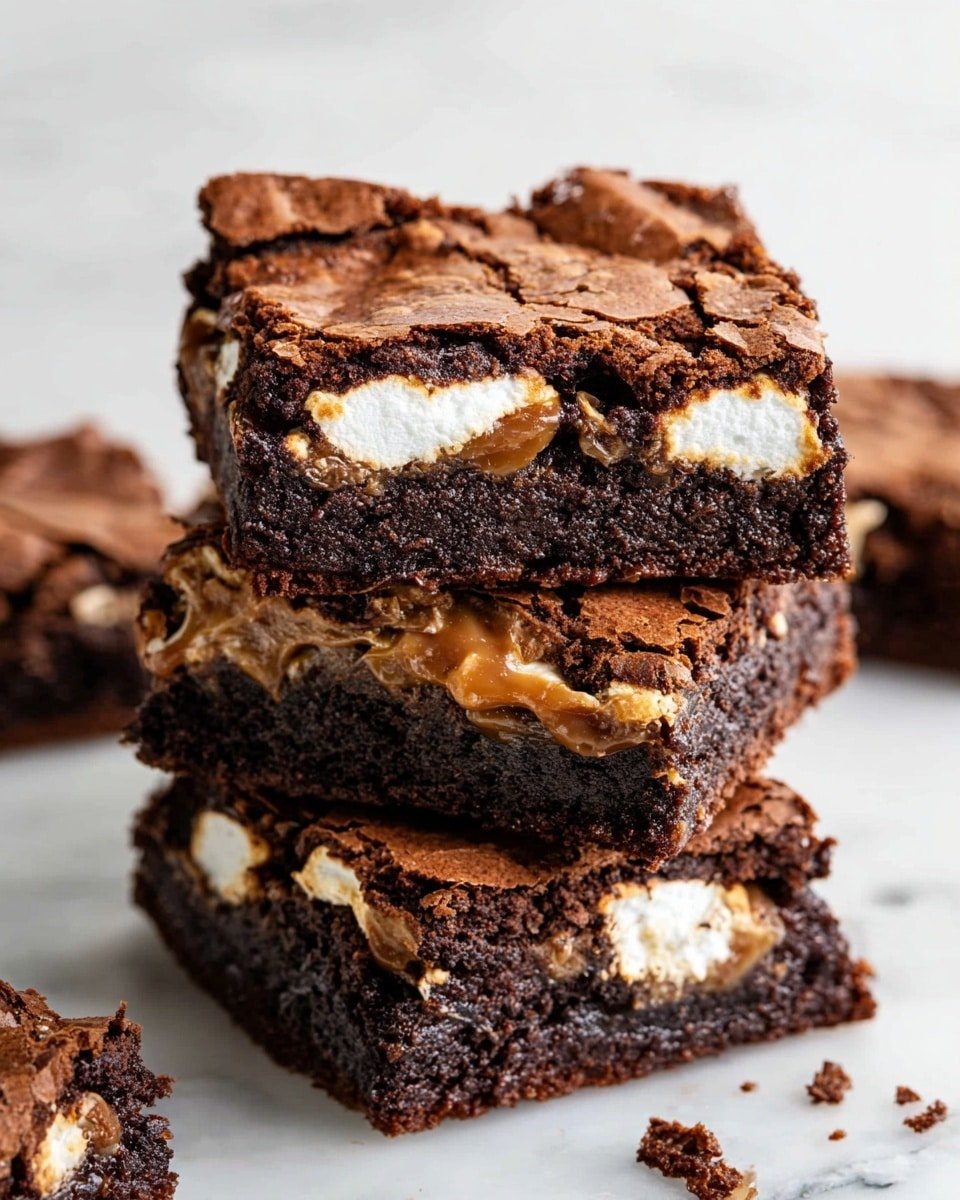
Here’s your shopping list for a batch of melt-in-your-mouth Fluffernutter Brownies Recipe. Each ingredient plays a starring role in that signature flavor and texture combo.
- 1 ⅓ cups (167.3 g) regular unsweetened cocoa powder – For that deep chocolate punch with a velvety finish.
- 1 cup (125 g) all-purpose flour – The structure that holds these brownies together, keeping them tender.
- 1 teaspoon baking powder – Adds just the right lift for a fudgy but soft crumb.
- ½ teaspoon kosher salt – Balances sweetness and enhances flavors.
- 1 teaspoon espresso powder – Amplifies chocolate richness without a coffee taste.
- 1 cup (2 sticks / 227 g) unsalted butter, room temperature – Adds luscious fat and moisture.
- 2 cups (400 g) granulated sugar – Provides that crisp brownie crust and sweet balance.
- 1 cup (168 g) semi-sweet chocolate chips – Melts into pockets of gooey chocolate goodness.
- 1 tablespoon vanilla extract – A warm aromatic note that rounds everything out.
- 4 large eggs, room temperature – Binds the batter and adds richness.
- ¾ cup (193.5 g) creamy peanut butter – The star ingredient that brings that creamy nuttiness.
- 1 cup (96 g) marshmallow fluff – Sweet, airy texture that makes these brownies unforgettable.
If you’re after a twist, try natural peanut butter or almond butter to change the nuttiness. For a gluten-free version, swap flour for a 1:1 baking flour mix that suits your dietary needs. Just remember, a little substitution can lead to new crave-worthy discoveries!
Gear Up Before Cooking
Having the right tools on hand makes this Fluffernutter Brownies Recipe not just easier, but more enjoyable. You’ll breeze through the steps and get that professional-quality edge at home.
Tools You’ll Need
- 9×13-inch ceramic baking dish: Perfect size for even baking and the right brownie thickness.
- Instant-read thermometer: Ensures butter and sugar reach that golden perfect temperature of 230°F.
- Large saucepan: For melting butter and sugar smoothly.
- Mixing bowls and whisk: For dry and wet ingredient prep, and to keep batter lump-free.
- Spatula and wooden spoon: Ideal for stirring gently and folding ingredients.
Step-by-Step to Fluffernutter Brownies Recipe Bliss
Let me take you through the simple, foolproof steps for making these crave-worthy brownies. You’re just a few moves away from fudgy, fluffy perfection!
- Preheat the oven to 350°F (175°C). Line your 9×13-inch ceramic baking dish with parchment paper. This guarantees easy removal and clean edges.
- Combine dry ingredients: In a large bowl, whisk together cocoa powder, all-purpose flour, baking powder, kosher salt, and espresso powder. This combo packs that chocolate punch and texture depth.
- Melt butter and sugar: Over medium heat in a saucepan, melt butter and sugar together. Once melted, bring to a gentle boil and let simmer for 2 minutes, stirring often, until it hits 230°F. This step is critical for that glossy, crackly top.
- Stir in chocolate chips and vanilla: Remove from heat and mix in chocolate chips and vanilla extract. Stir until melted and the mixture looks silky, though it may be slightly grainy—this is normal. Let cool for 10 minutes to avoid scrambling eggs in the next step.
- Add eggs one at a time: Stir constantly as you add eggs. This creates a smooth, rich batter that’s ready for magic.
- Fold in the dry ingredients: Gently mix your cocoa-flour blend into the wet chocolate batter until just combined. The thick batter signals you’re on the right track.
- Swirl in peanut butter and marshmallow fluff: Drop alternating dollops of peanut butter and marshmallow fluff across the top. Using a knife or skewer, swirl them artistically for that signature fluffernutter whimsy.
- Bake 28 minutes: Slide the pan into your preheated oven and let the brownies bake until edges are set but the center still jiggles slightly. A toothpick should come out with a few moist crumbs for fudgy perfection.
- Cool and slice: Let brownies cool completely in the pan on a wire rack. This step is key for clean cuts and luscious texture.
Pro Tips for Success
Keep your butter and sugar mixture precise at 230°F to get that iconic brownie crust. Don’t skip letting the batter cool before adding eggs; it prevents scrambling. When swirling in peanut butter and marshmallow fluff, resist over-mixing! You want distinct ribbons to create that gorgeous marbled look and flavor pops.
Flavor Variations for Fluffernutter Brownies Recipe
- Add chopped roasted peanuts for extra crunch and nutty goodness.
- Swap creamy peanut butter for almond or cashew butter for a unique twist.
- Mix in a teaspoon of cinnamon or cayenne pepper for a spicy kick.
- Use dark or white chocolate chips instead of semi-sweet for richer or sweeter notes.
- Add a drizzle of caramel or salted toffee on top post-bake for luxury indulgence.
- For vegan versions, use flax eggs and dairy-free butter alternatives—watch cooking times closely.
Make-Ahead, Storage & Freezing
- Wrap cooled brownies tightly in plastic wrap or store in an airtight container to keep them moist for up to 4 days at room temperature.
- For longer storage, freeze uncut brownies in an airtight container or wrapped in foil and plastic wrap for up to 3 months.
- When ready to enjoy, defrost overnight in the fridge, then bring to room temperature before slicing for clean cuts.
- Reheat individual pieces in the microwave for 10-15 seconds to revive that gooey warmth.
Fluffernutter Brownies Recipe FAQs
- Q: Do the eggs have to be room temperature?
A: Yes! Room-temp eggs incorporate more smoothly into the batter, preventing clumps or curdling. - Q: Can I chill the batter before baking?
A: You can chill for up to an hour to deepen flavors, but bring it back to room temp before baking for even cooking. - Q: How do I know when brownies are done?
A: Look for set edges with a slightly soft, jiggly center. Avoid overbaking to keep them fudgy. - Q: Can I use natural peanut butter?
A: Yes, but it may make swirls less smooth due to oil separation; stir thoroughly before swirling. - Q: What’s the best way to cut clean brownie squares?
A: Let brownies cool completely, then use a sharp knife wiped clean between cuts for neat slices.
Fluffernutter Brownies Recipe
Fluffernutter Brownies are a rich and decadent treat combining the deep flavors of cocoa and chocolate with a delightful swirl of creamy peanut butter and marshmallow fluff. These brownies feature a fudgy texture with a unique twist from the classic fluffernutter sandwich ingredients, making them an irresistible dessert for chocolate and peanut butter lovers alike.
- Prep Time: 20 minutes
- Cook Time: 28 minutes
- Total Time: 48 minutes
- Yield: 12 servings
- Category: Dessert
- Method: Baking
- Cuisine: American
- Diet: Vegetarian
Ingredients
Dry Ingredients
- 1 ⅓ cups (167.3 g) regular unsweetened cocoa powder
- 1 cup (125 g) all-purpose flour
- 1 teaspoon baking powder
- ½ teaspoon kosher salt
- 1 teaspoon espresso powder
Wet Ingredients
- 1 cup (2 sticks / 227 g) unsalted butter, room temperature
- 2 cups (400 g) granulated sugar
- 1 cup (168 g) semi-sweet chocolate chips
- 1 tablespoon vanilla extract
- 4 large eggs, room temperature
- ¾ cup (193.5 g) creamy peanut butter
- 1 cup (96 g) marshmallow fluff
Instructions
- Preheat Oven and Prepare Pan: Preheat the oven to 350°F. Line a 9×13-inch ceramic baking dish with parchment paper to prevent sticking and for easy removal of the brownies.
- Combine Dry Ingredients: In a large bowl, whisk together the cocoa powder, all-purpose flour, baking powder, kosher salt, and espresso powder until well combined. Set this mixture aside.
- Melt Butter and Sugar: In a large saucepan over medium heat, add the butter and sugar. Stir occasionally as the butter melts. Once melted, increase heat slightly to bring the mixture to a low boil, cooking for 2 minutes or until the mixture reaches 230°F on an instant-read thermometer.
- Add Chocolate and Vanilla: Remove the saucepan from heat and stir in the semi-sweet chocolate chips and vanilla extract until completely melted and smooth. The mixture may appear grainy at this point. Let it cool for about 10 minutes to avoid cooking the eggs in the next step.
- Incorporate Eggs: Add the eggs one at a time to the chocolate mixture, stirring constantly after each addition until the batter becomes smooth and uniform.
- Mix Dry Ingredients In: Add the pre-mixed dry ingredients to the wet chocolate-egg mixture and stir just until combined. Be careful not to overmix; the batter will be thick.
- Add Peanut Butter and Marshmallow Fluff: Drop spoonfuls of creamy peanut butter and marshmallow fluff over the brownie batter in the pan. Using a knife or skewer, gently swirl these ingredients together into the batter to create a marbled effect.
- Bake: Place the baking dish in the preheated oven and bake for 28 minutes, or until a toothpick inserted into the center comes out with just a few moist crumbs but not wet batter.
- Cool and Serve: Allow the brownies to cool completely in the pan on a wire rack before slicing into squares. This helps set the texture for clean cuts.
Notes
- Use room temperature eggs to ensure they incorporate smoothly into the batter without curdling.
- For a more intense chocolate flavor, consider using Dutch-processed cocoa powder.
- Be careful not to overbake the brownies; they should be fudgy and moist inside.
- Swirling the peanut butter and marshmallow fluff gently prevents mixing them fully in, creating a beautiful pattern and layered flavor.
- Allow the brownies to cool completely for easier slicing and better texture.
- If you prefer, substitute the espresso powder with instant coffee granules for a nuanced chocolate flavor.

